|
Making the woodyboard is an exclusive process that
Mike Bless has designed and created.
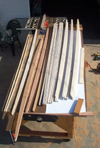
First, hand select different species/availabilities
of wood.
Next, based on the wood selected, begin the design
and layout of wood colors and stripe thicknesses.
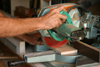
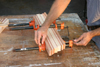
Cut wood to the selected design thickness, smooth out
all edges to be glued then glue every piece together
using multiple clamps.
Next, unclamp and machine one side to a smooth flat
surface to create a foundation to measure from.
At this point begins the process of creating the “rocker.” Imagine
the bottom rail of a rocking chair, unlike the rocking chair the board
rocker has an ever-changing radius. For example, the middle section of
the board will
have a flatter curve than the nose and the tail sections. The top of
the board rocker is altogether different from the bottom rocker.
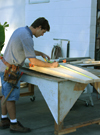
Once the rocker process is complete, the perimeter
shape is cut out. This must be done as symmetrically
as possible to give a great “out line” or
look to the board.
The next step is to start the very complex “ever changing” curvatures
to the “rails” this is where the board will undergo the
most critique from the potential viewer (particularly if he/she is
a surfer).
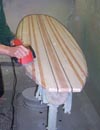
After all of the rough shaping is done the hand sanding
process begins. Unlike a light weight foam surfboard
the wood cannot have any final “cross grain” scratches
in it, this means that the wood needs to be sanded in a direction
parallel to the strips of wood, this makes things difficult when
trying to final shape
the
rails, especially the nose and tail areas.
When the board is completely shaped it is then ready
to undergo the finishing process. This begins by sealing
the wood so that when the
thick resin
is applied “out
gassing” or air from inside the wood does not come out and
form a bubbly and bumpy surface. Some woods need to be sealed differently
than others such
as the acidic or oily exotic woods.
The next step is to apply two coats of thick resin
to each side of the board. This is a 4-step process,
as each coat needs to dry
before
the
board can
be sanded and then turned over to do the other side.
Once both sides are finished, the board will receive a final
sanding preparing it to go through the polishing process, where
the board
is buffed and polished
to a brilliant shine.
After the polishing process, the board will be critiqued
to start a matching design for a fin that will be built
and later attached
to
the board.
The fin will undergo all the above process except for
the “rocker” cutting.
|